Total Pageviews

Tuesday 21 November 2017

Unable to open a .pptx (PowerPoint) file which received from mail

Dear Friends.
      Before some days my friend sent me a .pptx file,  means Microsoft PowerPoint file by mail. when I was trying to open this file, it was asking for repair, but after repairing MS PowerPoint problem did not resolved.I repair lots of time but problem didn't resolved.After doing R&D I got the solution of this problem.So Now I am going to tell you how to solve this problem in 2 Seconds.
 
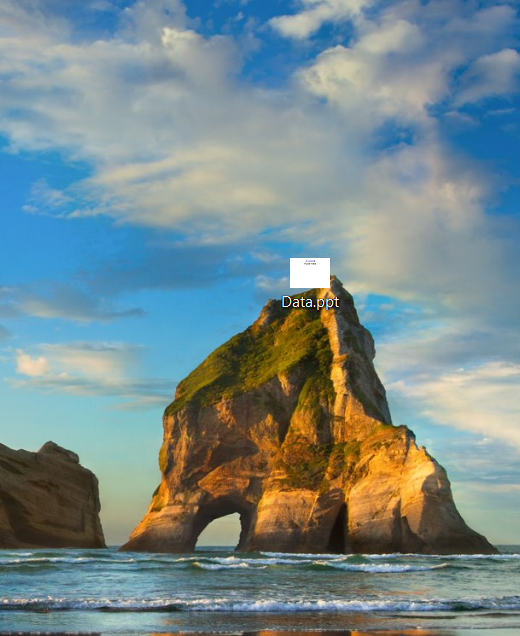
1.When I was trying to open .pptx file it was showing like this.


2.For fix this problem Right Click on the .pptx File and click on the Properties options.


3.Now select Unblock options.


4.Then click OK. Now try to open that file


5.Now try to open that file.


6.You will see that now you are able to see that file.


Hope you like this post. Click on the follow button so that you could receive all new my post.
You can also subscribe my blog by putting you mail id in Follow by Email Option, after putting your mail id & Submitting , you will received a mail on your Email. from clicking on that you can subscribe my blog , you can also suggest your friends from this option to subscribe this blog.

Thanks for Visiting Here

How to login in SAP logon by Command

Dear Friends As you know that Now days SAP is a very popular software. SAP use in most of the company.Some time you want to login in SAP by command for save your time because you know that SAP is priceless.So let's know.........
   
    1.Type this command for open SAP login page
                   press windows+R button & type "saplogon"


Wait few second


Sap login page will appear you soon like this.


2.And if you want to directly  login in any SAP server type this command.
       open run command and type  "sapgui  <Server IP>  <Instant No.>"
For Example you have to login in SAP Hana Server thats IP is 10.15.0.5 & Instant No. is 01 then type  "sapgui  10.15.0.5 01"


3.Now Login page will be appear.


Hope you like this post and it will be help you.

Thanks for Visiting Here.

Monday 2 October 2017

Check UP Board Result of All years (2000 to 2016)

For check previous years Results  (2000 to 2016) of UP Board High School & Intermediate  Click Here
          or Visit http://upmspresults.up.nic.in/HSSearch.aspx  
Thanks for Visiting Here

Sunday 1 October 2017

How to Share Internet Connection by Using Bridging Method

Dear Friends...
                    Today I am going to tell you that how to share Internet Connection by Using Bridging Method.

Advantage of Bridging :-
                               Suppose you use Internet in your PC by Mobile data or Data Card etc. And you want to share Internet so that you could use Internet in more PCs or Mobiles at the same time. Then you can use this method.
       Friends for use this method ,  you need 2 source for Access/Share Internet. One for access Internet & 2nd for share Internet.
  • For Access Internet you can use :- Mobile Internet , Data Card , Dongle , Wi-fi , LAN Cable etc.
  • For Share Internet you can Use :- Switch or Wi-Fi Router(ADSL Router)  
                  Suppose I have Air-tel 4G Dongle and I want to use Internet more than 2 Computers at the same time. And I want to share Internet Using ADSL Router or Switch. So first I will have to Connect Dongle with my PC & then I connect ADSL Router or Switch with my PC so that I could share Internet.
           Now I have Connected Both Lets Check.
           1.type "ncpa.cpl" in run Command & press enter button.


2.Now you can see it is showing two Connection 1st Enternet 1 that is Connect with ADSL Router/Switch & 2nd Ethernet 2 ( Airtel 4G ).


3.Now open Command prompt & type "ipconfig /all" Now note that Both Connections IP Address.


4. its Ethernet 2 means Airtel dongles IP note IP address. For Fill it Manual IP in Both Connections.


5.Now Put the Manually IP address in Ethernet 1.


6.Now Put the IP address of 2nd Ethernet in 2nd Ethernet and Ok  & Close it.


7.Now again type "ncpa.cpl" in Run Command.


8. Salect Both and then Right Click.


9.Click at Bridge Connection.


10.Now you can see you have successfully Shared the Internet Connection using Bridging method.


11.Now if were using Switch then just you can share Internet by LAN Cables and if you were using ADSL Router for share Internet then you share Internet by Wi-Fi.


Hope you like this Post.So Please don't forget to follow , like & Share.
Thanks for Visiting Here.


How to Configure Airtel/Jio Wifi Dongle/Router.

Dear Friends.
          This time lots of people have 4G wi-fi dongle. Some time we forgot the password of wi-fi dongle , or we want to change our wi-fi dongle's SSID & Password.So  I am going to tell you how you can configure Wi-fi dongle in few seconds.So lets start......

1. Connect your Dongle with PC by Micro USB Cable.


2.Now Just Click on your Computer Icon , Now you can see here is showing your Dongle setup.Open it.


3.Now Install this setup by just Double click on auto-run file.


4.After Installing this Setup . You Can see it on your Desktop.


5.Now open Command Prompt.you can also open it by just typing CMD in run command.


6.Now type "ipconfig" in command prompt & press Enter button.


7.Now just check Default gateway IP. & open Internet Explorer.


8.Type Default gateway IP in internet Explorer & Press Enter Button.


9.Now it will ask for password & username. Default Username is :- "admin" , & Password is also "admin", in some types of dongle or routers default password is :- "password".


10.Now just click on Setting option.


11.Now click at Wi-Fi settings.


 12.From here you can see your wi-fi SSID & Password.You can also change your wi-fi dongle password &


Hope you like this post.Don't forget to follow , like & share this post.
Thanks for Visiting here.


Saturday 16 September 2017

How to enable Macro in Microsoft office 2010/2007/2003

What is Macro :- Micro is a feature of Microsoft Office. We can record & View a message by the help of "Micro Record " Option. It's a very useful feature . Means you can say Macro Record our Word & Excel Screen.

How to Enable :-
         If your micro is disable in MS Office Word or Excel then for Enable Macro follow these steps  :


1:- You Can here Macro is disable . So that I can not record a macro. Lets Enable Macro


2:- Open Run Command & Type" Appwiz.cpl " and press Enter.


3:- Now Select you Microsoft Office & Click on Change Option.


4:- Now Click Add & Remove Features & Then Click Continue.


5:- Now Click on Office Tool & Select Run all from my Computer.


6:- Now Click at Office Shared Features & Select Run all from my computer.


7:- Now Click on Continue.

8:- Wait a few seconds.


9:- Now Again open your Excel or Word.


10.You will see that you macro has been enabled. Now you can use you macro.


Hope its help you to enable macro.
Thanks for visiting here.

Wednesday 13 September 2017

Some Basic Windows Softwares Extensions & Latest Versions Details

You will have been seen that sometime someone ask about the software’s latest versions & extensions. Means suppose you are in an interview and Interviewer ask to you that how many software you know to operate or which kinds of software do you use.

As soon as you reply then it is a common thing that he will ask about the latest version of that software or extensions of that software. If you did not give the answer of that question then it will be a negative point for you. Generally you should know the details about that which we are using. For example I was in an interview and interviewer ask me , what was that last application that you use recently . I said : Lotus Note. then he ask what is the extensions of lotus note then my answer was sorry , because of before this I did not notice about it. So that’s why I am uploading this post you must read it. Here is some basic windows software’s latest versions & extensions details.


Some Basic Windows Softwares Extensions & Latest Versions Details
Sr.No.
Software Name
Extensions
Latest Version
Releasing Date
1
Adobe Reader
.pdf
DC 2017.012.20093.

2
Adobe Flash Player
.flv
26.0.0.151

3
Adobe PageMaker
.pmd
Pro 7.0.2
30-Mar-2004
4
Adobe Photoshop
.psd , .psb (more than 2GB)
CC 2017.1.1 (18.1.1)
25-Apr-2017
5
Google Chrome
HTML, JavaScript, and CSS.
61.0.3163.79
5-Sep-2017
6
Lotus Notes
.nsf
9.0.1 FP9
18-Aug-2017
7
Microsoft Word
.docx , .docm
Word 2016
2015
8
Microsoft Excel
.xlsx , .xlsm
Excel 2016
2016
9
Microsoft PowerPoint
.pptx
PowerPoint 2016
10
Microsoft Access
.accdb
Access 2016
8-Mar-2016
11
Microsoft Outlook
.pst
Outlook 2016
22-Sep-2015
12
SAP

EHP8
20-Jan-16
13
Team Viewer

12.0.83369
4-Sep-2017
14
Tally

Tally.ERP 9 Release 6.1
29-Aug-2017
15
WinRaR

WinRAR 5.50
18-Aug-2017

Thursday 6 July 2017

How to Create WDS Server.

WDS Server :- WDS (Web Deployment Services). it is a feature of Server 2008R2 that provide you to feature for formatting system in a Network without CD/DVD or Pendrive.

Use of WDS Server :- Suppose you are the system administrator of a Company. and in your company , you have 100 PCs & you have  to install Win-7 in all system.then you have two (2)  option that install OS in every system one by one by CD/DVD or PD and for it you will need to lots of time and PD/CD/DVD means you will have to work hard. But if you want to install OS in every System in Smart Way or in very less time.then you must create WDS Server. Hope you have understood the Concept of WDS Server.

For Get Full Book  Click Here 


Requirement :-
                    1.Should be install Sever 2K8 or upper Version
                            if you don't know how to install then Click here
                    2.Should be in a network
                    3.Should be Install ADDS Services
                       if you don't know how to install then Click Here
                    4.Shoud be Configure DNS Services
                                  for more details Click Here
                    5.Should be install DHCP Services
                                   for more details about DHCP Click Here
                       6. Need an OS file in CD or Pendrive

So lets Start.....
                     1.Administrative menu to Server Manager


2.Click Add Roles.

3.Select Web Deployment Services.


 4.Next


5.Next.
 6.Wait


7.Close.

8.Now Click Administrative Menu & Select Web Deployment Services.


9.Click on Servers..

 10.Right Click on Domain Name Server & Click Configure Servers.


11.Next.

12.Next.

13.Yes
 14.Select Both


15.Next.

 16.Select Response to all Clients (Know & Unknown) & Next.


17.Wait....

18.Select add image to Servers & Next.


19.Cancel
 20.Yes
 21.Right Click on Boot Image & Click on Add Boot Image..


22.Browse..

23.Go to in your OS CD/DVD/PD the goto the Sources


24.Select boot.wim File.

25.Next
 26.Click on Next

27.Next

28.Wait....
29.Finish..


 30.Now Right Click on Install Image & Select Add install Image

 31.Give a name & Next


 32.Browse


 33.Select install.wim from OS CD\Sourse\install.wim

 34.Next


35.Next
 36.Next

 37.Wait.....

38.Finish...

Congratulation ! You have successfully created WDS server.
Now you can Format any System in your network without CD/DVD/PD

Hope you like this Post.
Thanks for visiting Here.....www.no1security.blogspot.com